Quick review
Science Kidz Programming App
One Windows app where students program the Science Kidz Nano and ESP32 boards with Scratch-style blocks, see and edit the Arduino code, drive Bluetooth robots from the phone apps they make, and build Wi-Fi and IoT projects on the ESP32.
Phase 1 proposal for Manish Parekh, Science Kidz Educare Pvt Ltd, by Prajwal Shelar
₹1,00,000 covers Phase 1: what your students use in class every week, on your own boards. Everything else has its own price, on the Add-ons tab.
Agreed on our call on 9 October: ESP32 Wi-Fi and IoT is now part of Phase 1, in place of the Pico blocks, which move to the add-ons. You chose the vision blocks (₹20,000), built in Months 5 and 6. Python with Thonny is now ₹20,000. Payments fall on the 15th of the month, and the terms now say what happens if either of us stops the project.
Your first message
Your requirements, and what ₹1,00,000 covers
Your first message set the budget, the timeline, the payments and the scope. Here is each line, whether it fits in ₹1,00,000, and why.
| You asked for | In ₹1,00,000? |
|---|---|
| Budget: ₹1,00,000 | Yes Phase 1 is fixed at ₹1,00,000. It fits because Phase 1 covers what your classes use every week, and the larger items (Python, the larger vision features, the AI that helps with code, the Pico blocks, a Mac version) are priced separately. |
| Timeline: 6 months | Yes Six months: about 2 weeks of design, every Phase 1 feature built by Month 5 with a working version each month, and Month 6 for fixes, training and handover. |
| Payments: ₹10,000 a month, and the rest together in the fifth month when all is done | Yes, as you proposed ₹10,000 to start, then payments on the 15th of the month: ₹10,000 for each of Months 1 to 4 once accepted, and ₹50,000 once Month 5 is accepted, when everything is built, as you planned. |
| Progress-based development, to release each amount | Yes Each payment follows a demo on your real boards and a check by your tester against a written list. |
| A Scratch type platform, an editor for programming | Yes, fully Scratch-style blocks with sprites, the stage and games, and the robotics blocks, in one Windows app. |
| Arduino | Yes, fully Your Science Kidz Nano with its port names, your 27 modules, up to 40 sensor blocks, and Bluetooth robots driven from your phone apps. |
| ESP32 | Yes, with Wi-Fi and IoT Your ESP32 board with its port names, your modules and its Bluetooth, and since our call on 9 October, Wi-Fi and Blynk blocks for phone dashboards and home automation. |
| Pico programming | Moved to the add-ons As agreed on our call on 9 October, in exchange for Wi-Fi and IoT in Phase 1: Pico and Pico W with blocks, ₹6,000. MicroPython on the Pico comes with the Python feature. |
| Text-based coding support | Yes, for Arduino code Students see the Arduino code, edit it and upload it, with errors and their line numbers. Python is an additional feature, from ₹20,000, because Python with OpenCV and MediaPipe is a project of its own. |
| AI integration | Partly in Phase 1 For vision, the QR code and colour blocks with the webcam are included. Chosen Faces, hands and gestures, the vision blocks, ₹20,000, built in Months 5 and 6. Train your own image recognition (₹12,000) comes when you choose it. Later, as you said The AI that teaches students and helps with their code, ₹18,000 plus AI usage. |
In short: everything in your first message fits in ₹1,00,000 except Python, the larger vision features, the Pico blocks we swapped for Wi-Fi and IoT, and the AI that teaches and helps with code, which can come later, as you said. Your form later added more, such as Wi-Fi and IoT (now in Phase 1), Python and a Mac version. The full list, and where each item is, is at the end of this overview.
At a glance
What is included, and what is not
Included in ₹1,00,000
- A Windows 10 and 11 app with your name and logo, in one installer, that works offline
- Scratch-style blocks with sprites, the stage, costumes, sounds and games
- Your boards by the names printed on them: Science Kidz Nano and ESP32. Standard boards such as the Arduino Uno come as they are, with their usual pin numbers
- The app finds your board when it is plugged in
- Easy blocks for the 27 modules in your kit, the joystick and the traffic light, and up to 40 sensor blocks in all, counting the sensors among your modules, from the list in the scope document
- Bluetooth robots with the HC-05, HC-06 and the ESP32's Bluetooth, driven from your App Inventor phone apps
- ESP32 Wi-Fi and IoT: Wi-Fi blocks, and Blynk blocks that send sensor readings to a phone dashboard and switch lights and relays from the phone
- QR code and colour blocks: the webcam shows on the stage, and sprites react to the QR codes and colours it sees
- The Arduino code next to the blocks, code editing with error lines, one-click upload over USB, and the serial monitor
- Saving and opening projects
- The extension library: your blocks, Scratch's Music, Pen and Video Sensing, about 15 ready-made module extensions, and students' own Arduino code
- A button that opens MIT App Inventor
- The design weeks and the signed Phase 1 scope document
- A test version every month, a demo on a video call with a short progress note, and 7 days for your tester
- Online training for your senior mentors, recorded, and a user guide
- 30 days of free fixes after the final version
- The final version and the source code, with a permanent right to use, change and rebrand the app for your students
Not included
Additional features, each with its own price
- Vision blocks: faces, hands and gestures, and robots that react to the camera, ₹20,000 (chosen on our call, built in Months 5 and 6)
- Train your own image recognition, ₹12,000
- Pico and Pico W with blocks, ₹6,000
- Python and MicroPython with OpenCV: ₹20,000 with Thonny set up for your classes, or ₹45,000 as an editor inside the app
- AI helper that explains code, ₹18,000 plus AI usage
- Mac version, ₹30,000 plus Apple's yearly fee
- Check connections, ₹12,000
- Web version and Android app, and more extensions like PictoBlox: quoted when you choose them
These prices hold until 30 June 2027. Each feature is paid half when you order it and half when it is accepted; the vision blocks you chose, half when their work starts and half once accepted.
Later, quoted when you want them
- Uploading and live control over Bluetooth, example projects, lessons inside the app, turtle graphics, MicroPython blocks, Hindi and Marathi, port names and checklists for an Uno board, and sensors beyond your list of 40
Not needed now, as you said
- Teacher features and logins, and the parts camera
Paid directly by Science Kidz
- The boards, modules and courier; the Wi-Fi network and Blynk accounts for your classes, and a paid Blynk plan if your projects need more than its free plan; AI usage and Apple's fee if those features are chosen; a code-signing certificate if you want one; a server for a web version
Agreed separately
- Support after the 30 free days, and selling or licensing the app to other schools
Online, not at the centre
- Demos, testing and training happen on video calls; visits to the centre are not included
From today to Month 1
Design first, then one scope document we both sign
This proposal agrees what Phase 1 covers, the fee and the months. The six months start with about 2 weeks of design, in which I write every detail into one Phase 1 scope document. Once we both sign it, the six monthly checkpoints follow, about 4 weeks apart, and each one is built and checked against it.
Accept this proposal
On WhatsApp from this page or on our call, with any changes we agree, and pay the ₹10,000 advance. I then send you this version as a PDF for your records.
Design, the first 2 weeks
Science Kidz sends the port chart, the sensor list and the Nano boards. I set up the app's code, send a first program from the app to your Nano board, and plan every part of Phase 1.
The scope document
Every feature, every block with its name, ports and what it does, every monthly checklist, and what is not included. You check it within 5 days, and we both sign the PDF on a phone or computer.
Month 1 starts
Building starts once the scope document is signed: digital and analog control on the Science Kidz Nano board.
If this proposal and the signed scope document ever differ, the scope document is what counts. Anything not in it is a change, handled as described under Terms.
Your questionsA web version later, and detecting what is connected
Can the app become a web app later?
Yes, and most of the work carries over. The blocks, the stage, your boards, your module blocks and the students' project files are all built with web technology, so they move to a website as they are.
How it would work
What changes is how the app reaches the board. On a website, programs are compiled on a server, and Chrome or Edge send them to the board over the USB cable. That works on Windows laptops, Macs and Chromebooks; iPhones and Safari can't connect to boards. A website needs a server, with a monthly cost and upkeep, and logins if students save their work online. An Android app can come from the same code too, with extra work for USB and Bluetooth on the phone and the same server for compiling programs. Phase 1 is designed so that this is a later step, not a rewrite. It is quoted when you choose it.
Can the app detect what is connected?
The board, yes. The modules, only those that can identify themselves.
What can be detected
- The board. When a board is plugged in, the app recognises its USB chip and connects to it. This is in Phase 1.
- Modules with their own chip. The LCD and OLED displays, the RTC clock, the BMP pressure sensor and the ADXL345 and MPU6050 motion sensors answer the board with their own address, and the RFID and nRF24 modules can be asked for their chip's ID, so a check can name them. The DHT11 and the ultrasonic sensor can be found by testing each port.
- Simple modules. An LED, buzzer, motor, relay, button, IR, LDR, PIR, soil or gas sensor has no chip. To the board it is only an on or off signal or a value, so the app can't tell which module it is. Kits that name every module, like LEGO Spike, put a chip inside each one.
A check that names the modules it can, with a live view of every port on the Nano board, is the Check connections additional feature, at ₹12,000.
Your full listEverything you asked for, and where it is
Your first message is answered at the top of this proposal. Your form listed 36 features: 23 marked "must have now" and 13 "can come later". You added more on our call and in your messages. This is where each one is.
Marked "must have now" in your form
| You asked for | Where it is |
|---|---|
| Scratch-style block coding for the boards; sprites, animations and games | Phase 1 |
| See the Arduino code made from the blocks; write and edit the code, then upload it | Phase 1 Code editing is checked in Month 3 |
| Upload to the board with one click; serial monitor; save and open projects | Phase 1 |
| Science Kidz Nano board and Science Kidz ESP32 board | Phase 1 The Nano from Month 1, the ESP32 with Wi-Fi and IoT in Month 4 |
| Raspberry Pi Pico | Additional feature Pico and Pico W with blocks, ₹6,000. Moved out of Phase 1 on our call on 9 October, in exchange for ESP32 Wi-Fi and IoT. MicroPython on the Pico comes with the Python feature |
| Bluetooth projects: program the robot to use Bluetooth with blocks | Phase 1 Month 3, checked with your own Bluetooth Robot program and phone app |
| Windows app that works fully offline | Phase 1 Only the App Inventor button needs internet |
| MIT App Inventor inside the app | Phase 1 A button that opens App Inventor in the browser, as agreed on our call |
| Computer vision: face, text and hand gesture detection | Phase 1 QR codes and colours with the webcam. Chosen Face and hand gesture blocks, ₹20,000, in Months 5 and 6. Python with OpenCV, for the Techno Pi R4 vision sessions including text detection, comes with either Python option |
| ESP32 Wi-Fi and IoT projects (Blynk, home automation) | Phase 1 Month 4. Moved into Phase 1 on our call on 9 October, in place of the Pico blocks |
| Python editor (Python L-1 and L-2); MicroPython on the Pico | Additional feature Python and MicroPython: ₹20,000 with Thonny set up for your classes, or ₹45,000 as an editor inside the app. MicroPython after Phase 1, as agreed on our call |
| AI that explains code and errors to students | Additional feature ₹18,000 plus AI usage. After Phase 1, as you said on our call |
| AI blocks students can program (chatbot, speech) | Later A later extension, quoted when you choose it |
| Mac app | Additional feature ₹30,000 plus Apple's yearly fee. After Phase 1, as agreed on our call |
| Teacher features; AI camera that recognises parts from a photo | Not needed now As you said on our call |
Marked "can come later" in your form
| You asked for | Where it is |
|---|---|
| Live graph of sensor readings | Later The graphs and data extension, quoted when you choose it |
| Ready-made example projects for each course | Later Quoted when you choose it |
| Arduino Uno | Phase 1 Students can program a standard Arduino Uno in the app as it comes, with its usual pin numbers. It isn't on the monthly checklists, because your classes use the Nano; port names for an Uno board can come later |
| Control the robot live from the computer over Bluetooth; upload programs over Bluetooth | Later Phase 1 uploads by USB, as your classes do today |
| Turtle graphics in Python | Later With Python, quoted when you choose it |
| AI that suggests projects from the parts a student has | Later Quoted when you choose it |
| Lessons and course content inside the app | Later Quoted when you choose it |
| Student logins and accounts | Not in Phase 1 No logins, as you said on our call |
| Android mobile app; web version that runs in a browser | Later Yes, both can come later; see Your questions above |
| LEGO WeDo and Spike programming inside the app | Later A later extension, quoted when you choose it |
| Interface in Hindi or Marathi | Later Phase 1 is in English |
Added in your form, on our call and in your messages
| You asked for | Where it is |
|---|---|
| 200 to 500 students on their own Windows 10 and 11 laptops with 8 GB, installed by your team at the centre | Phase 1 One installer that works offline, checked on Windows 10 and 11 laptops |
| Port names printed on your boards on the blocks, not pin numbers | Phase 1 |
| A working version every month, starting with digital control | Phase 1 Six monthly checkpoints; Month 1 is digital and analog control |
| More sensors: around 30 to 40 sensor blocks, mostly a new name and pin on the same kind of block | Phase 1 Up to 40 sensor blocks in all, counting the sensors among your modules, from the list in the scope document |
| AI like PictoBlox: image recognition, QR code and colour detection, both as blocks and in Python with OpenCV | Phase 1 QR codes and colours. Chosen Faces, hands and gestures, ₹20,000, in Months 5 and 6. Python with OpenCV comes with either Python option |
| Extensions like the many in PictoBlox, later or now if possible | Phase 1 The extension library. More extensions later, quoted when you choose them |
| The app detects the pins and what is connected when a board is plugged in | Phase 1 Finding the board. Additional feature Check connections, ₹12,000, names the modules that can identify themselves |
| Can the app become a web app later? | Later Yes; see Your questions above |
| Training for your senior mentors, who then train the other teachers | Phase 1 Online and recorded, in Month 6 |
| Science Kidz buys the boards and sends them by courier | Agreed Listed under What we need from you |
| The app's name is decided later | Agreed The working name stays until you choose |
Inside ₹1,00,000
Phase 1, in detail
What Phase 1 includes and how each part works, your modules, Bluetooth, and the checklist for each month. Tap "How it works" on any part to see the details.
Features
What Phase 1 includes, and how each part works
Scratch-style blocks, sprites and games
The block style students already know from Scratch, with sprites, the stage, costumes, sounds, animations and games, and the robotics blocks in the same app.
How it works
The app uses open source libraries from OpenBlock and Scratch 3 for the block editor, the stage and the sprites, so students get the Scratch blocks they know. On top of them I build the Science Kidz app: your boards and port names, your module and sensor blocks, Bluetooth, the code editor and the installer, with your app name and logo.
Your boards, by the names printed on them
Science Kidz Nano board and Science Kidz ESP32 board.
How it works
The student picks the board from a list. The blocks then offer the port names printed on that board, taken from your port chart, and the app knows which pins each port uses. The app also lists standard boards such as the Arduino Uno as they come, with their usual pin numbers; only your boards are on the monthly checklists. The Pico and Pico W with blocks, and MicroPython for the Pico, are on the Add-ons tab.
Finds your board when it is plugged in
Plug in your Nano or ESP32 board and the app finds it and connects to it, with no searching through a list of ports.
How it works
The app recognises the USB chip on each board, so it knows a board has been plugged in, which port it is on and which of your boards it is likely to be. If two boards use the same USB chip, the student picks the board once. Finding which modules are connected is a separate feature, explained under Your questions.
Easy blocks for every module and sensor
A block for each of the 27 modules in your kit, plus the joystick and traffic light from your activity sheets, and your other sensors: up to 40 sensor blocks in all, counting the sensors among your modules, from the list in the scope document.
How it works
Each module gets a picture block in plain words, like the "Set BO Motor" and "Moisture sensor input" blocks in your ArduBlock sheets: choose the port, set the value. Sensors read as on or off share one block style, and sensors read as a value share another, so, as you said, each new sensor only needs its name, its picture and its port. Each block writes the matching Arduino code, so students can see what it does. Up to 5 sensors may need a library or extra logic, such as a heartbeat sensor or a rotary encoder; more than that is quoted separately. Every sensor is checked on the Nano board, and on the ESP32 board the ones used in your Tech Wizard R3 course.
ESP32 Wi-Fi and IoT
Wi-Fi and Blynk blocks for the Science Kidz ESP32 board, for the IoT and home automation projects in Tech Wizard R3: sensor readings on a phone dashboard, and lights, relays and motors switched from the phone, from anywhere with internet.
How it works
- Wi-Fi blocks. Connect to a network with its name and password, check whether the board is connected, and show the board's address in the serial monitor.
- Blynk blocks. Connect the board to Blynk with the device's code from the Blynk app. Send a sensor reading, such as the DHT11 temperature or the soil moisture, to a gauge or chart on the phone every few seconds. React when a button, switch or slider on the phone changes, to switch a relay or LED, set an LED's brightness or turn a servo. Send a phone notification when something happens, such as smoke detected.
- What the projects need. Internet on the Wi-Fi network, and a free Blynk account with the phone dashboard set up in the Blynk app. Blynk sets its own plans and limits; the free plan suits class projects with a few boards. The blocks write the matching Arduino code, as all the other blocks do.
Checked in Month 4 with the Wi-Fi and Blynk projects from your Tech Wizard R3 course, on your ESP32 board.
An extension library, like PictoBlox
An "Add extension" button opens a library of extra blocks: your Science Kidz boards, modules and sensors; Scratch's Music, Pen and Video Sensing; and ready-made blocks for about 15 more modules, such as NeoPixel LED strips, digit and LED matrix displays, a 16-servo driver, an MPU6050 gyro sensor, a heart rate sensor, a colour sensor, an SD card and a PS2 game controller. Advanced students can also insert their own Arduino code.
How it works
The library uses OpenBlock's open source extension system. Each extension is a separate set of files, so new ones can be added in later phases without changing the rest of the app. The ready-made module blocks are checked by building their code for your Nano board, and for the ESP32 where their library supports it; the ones for modules in your kit are also checked on your boards.
QR codes and colours with the webcam
Blocks that read QR codes and tell colours through the laptop's webcam, so sprites react to what the camera sees. These are two of the three things you named for AI; faces, hands and gestures come with the vision blocks you chose, in Months 5 and 6.
How it works
The webcam picture shows on the stage. A QR block gives the text inside a code, and a colour block tells which colour is in the middle of the picture, such as red, green, blue or yellow. It all runs on the laptop, without internet, and camera pictures are not sent anywhere. Making a robot react to the camera comes with the vision blocks.
One-click upload over USB
One Upload button sends the program to the board. No Arduino IDE needed.
How it works
The app turns the blocks into Arduino code, compiles it on the laptop and sends it to the board over the USB cable. The compiler and the USB drivers for your boards (CH340, and CP2102 for ESP32 boards that use it) come inside the installer, so uploading works without internet.
See and edit the code
The Arduino code is shown next to the blocks. Older students can switch to the code, change it and upload it.
How it works
The code panel updates as each block is added. A student who switches a project to code edits it as in the Arduino IDE. Typed changes don't turn back into blocks, so that project then stays as code. If the code has a mistake, the app shows the error and its line number.
Serial monitor
See the messages and sensor readings the board sends, as in most of your activity sheets.
How it works
A panel in the app opens the board's serial connection at the speed you choose (9600 in your sheets) and shows each line the program prints.
Save and open projects
Projects save as files and open again exactly as they were.
How it works
A project is one file on the laptop. A student can send it to a teacher on WhatsApp, by email or on a pen drive, and it opens the same way in the app on another laptop.
MIT App Inventor button
A button that opens MIT App Inventor, for making the phone apps.
How it works
It opens App Inventor's website in the student's browser, where they work as they do today. App Inventor itself is not changed. This is the one part of Phase 1 that needs internet.
One installer for Windows
One installer for Windows 10 and 11, installed by your team at the centre.
How it works
One file of about 1 to 2 GB, because it carries the tools for every board. I share it as a download link; your team copies it to a pen drive and installs it on each laptop. After that, the app needs no internet. Windows may show a "Windows protected your PC" notice for a new app; your team clicks "More info", then "Run anyway". A code-signing certificate, a yearly cost for Science Kidz if you want one, shows your company as the publisher and makes these notices less frequent.
Training for your senior mentors
An online training session for your senior mentors, and a short user guide.
How it works
The session is recorded, so your senior mentors can use it to train the other teachers, and new staff can watch it later.
Modules
Easy blocks for every module in your kit
Plus your other sensors: up to 40 sensor blocks in all, counting the sensors among the modules above, from the list in the scope document. Sensors read as on or off, or as a value, are included, and so are up to 5 that need a library or extra logic. Sensors beyond that, or added after Month 3, are quoted separately or move to a later checkpoint.
The part that failed last time
Bluetooth robots, the way your class works today
Build with blocks
The student makes the Bluetooth program in the new app.
Upload by USB
One click, over the cable, as with every other project.
Robot listens
Through the HC-05, HC-06 or the ESP32's built-in Bluetooth.
Drive from the phone
With the Android app the student made in MIT App Inventor.
How it works
Bluetooth blocks for the HC-05 and HC-06 on the Nano board, set up the way your ArduBlock block does it (TX, RX and speed), and for the ESP32's built-in Bluetooth. The program runs on the robot itself, so the robot reads the letters the phone app sends, such as F and B, and acts on them, and the serial monitor keeps working while it does.
Month 3 is accepted only when your own Bluetooth Robot class program, rebuilt with blocks, drives a real robot from your class phone app.
Six months, one result every month
Monthly milestones and their checklists
Each milestone is shown working on the real Science Kidz boards and checked against its list. These lists are what "done" means, agreed before work starts. Every Phase 1 feature is built by Month 5; Month 6 is for fixes, training and handover, and for the vision blocks you chose.
Month 1Digital and analog control on the Nano
- The app installs on a Windows 10 and a Windows 11 laptop that do not have the Arduino IDE.
- Plugging in the Science Kidz Nano board finds it and connects to it, with no searching through a list of ports.
- A program made with blocks blinks an LED on Port 1 of the Science Kidz Nano board, after one click on Upload.
- The LED, buzzer, traffic light and variables activities from your Digital Outputs sheet work on your board.
- The IR, LDR, touch and moisture sensor activities from your Digital Inputs sheet work, including the readings in the serial monitor, the LED control and the counters.
- Push button, PIR, line sensor and smoke sensor can switch an LED and the buzzer, and the RGB LED shows red, green, blue and a mixed colour.
- The on or off sensors from your list that have arrived work with one block style, each with its own name, picture and port.
- The Arduino code is shown next to the blocks.
- A project is saved, the app is closed, and the project opens again unchanged.
- A sprite moves and changes costume when a key is pressed, as in Scratch.
Month 2Motors, sensors and displays
- The DC motor and BO motor activities from your Digital Outputs sheet work, and two motors through the motor driver go forward, backward, left and right at a chosen speed.
- The servo activities work, with slow and fast movements.
- The ultrasonic activities work: the distance in cm shows in the serial monitor, and an LED turns on when something is closer than 10 cm.
- DHT11 temperature and humidity show in the serial monitor, on the LCD and on the OLED display, and the LCD prints "Science Kidz".
- IR remote buttons control an LED or the motors.
- The value sensors from your list that have arrived work with one block style, with their readings in the serial monitor.
- The relay switches the water pump, and the pump follows the soil moisture sensor.
- A line follower robot and an obstacle avoiding robot, made only with blocks, work on the Science Kidz robot.
Month 3Bluetooth and code editing
- The Bluetooth LED and Bluetooth motor activities from your sheets work: the phone sends F and B, and the board reacts.
- Your Bluetooth Robot class program is rebuilt with blocks, uploaded over USB, and the robot is driven with your class phone app through the HC-05. The same works with an HC-06.
- A value from the board, such as a sensor reading, shows on the phone.
- The keypad, RFID and joystick activities from your Digital Inputs sheet work: keys, the password, the card ID, access granted or denied, and the joystick's X and Y.
- A student switches from blocks to code, changes the code and uploads it.
- If the code has a mistake, the error and its line number are shown.
Month 4ESP32 board, Wi-Fi and IoT
- Blocks use the port names printed on the Science Kidz ESP32 board, and plugging the board in finds it and connects to it.
- The Month 1 and Month 2 checks pass on the ESP32 board, for the modules used in your Tech Wizard R3 course.
- The robot is driven with your class phone app through the ESP32's built-in Bluetooth.
- The ESP32 connects to a Wi-Fi network with blocks, and the serial monitor shows that it is connected.
- A DHT11 temperature and humidity reading shows on a Blynk dashboard on the phone, updating every few seconds.
- A button on the Blynk phone app switches a relay and a light on the ESP32 board, and a slider sets an LED's brightness.
- A phone notification arrives from Blynk when the smoke and gas sensor detects smoke.
- The Wi-Fi and Blynk projects from your Tech Wizard R3 course, from the list in the scope document, work on your ESP32 board.
Month 5Remaining modules, QR codes and colours: everything built
- BMP pressure sensor, RTC clock module and ADXL345 accelerometer readings show in the serial monitor and on a display.
- Two boards send messages to each other with nRF24 modules.
- QR code and colour blocks: the webcam shows on the stage, a QR code's text is read, and a sprite reacts to a red, green or blue card.
- Every sensor on the list in the scope document works on the Science Kidz Nano board.
- The MIT App Inventor button opens App Inventor in the browser.
- The extension library shows your Science Kidz blocks, Scratch's Music, Pen and Video Sensing, and the ready-made module extensions, each checked by building its code for the Nano, and for the ESP32 where its library supports it.
- The user guide is shared for review.
- The vision blocks you chose are built during Months 5 and 6 and checked as their own checkpoint, with their own payment, so they never hold up the Month 5 payment.
Month 6Classroom ready: fixes, training and handover
- Everything reported by your tester against Months 1 to 5 is fixed.
- Online training session for your senior mentors, recorded for the other teachers.
- The final version is shown working, with the user guide.
- The source code and the final user guide are handed over. The version with no time limit came the day the final payment arrived.
Checked against your own classes
Your activity sheets are the checklists
The Digital Inputs and Digital Outputs sheets you shared hold about 40 class activities, each with its ArduBlock program and the Arduino code. In Months 1 to 3, each one is rebuilt with the new blocks and must do the same thing on your board, on the same pins. The code may look a little different; what counts is the same behaviour.
Priced separately from Phase 1
Additional features
Everything here is outside the ₹1,00,000 Phase 1. Each feature can be added on its own, and each one shows how it would work, how long it takes and its price.
At a glance
Prices
| Feature | Time | Price |
|---|---|---|
| Vision blocks: faces, hands and gestures, and robots that react to the camera (QR codes and colours are in Phase 1). Chosen on our call | About 3 weeks | ₹20,000 |
| Train your own image recognition (needs the vision blocks) | About 2 weeks | ₹12,000 |
| Pico and Pico W with blocks | About 1 week | ₹6,000 |
| Python and MicroPython with Thonny, set up for your classes (includes vision in Python with OpenCV) | About 3 weeks | ₹20,000 |
| Python and MicroPython as an editor inside the app (includes vision in Python with OpenCV) | About 6 weeks | ₹45,000 |
| AI helper that explains code (plus AI usage, paid to the provider) | About 2 to 3 weeks | ₹18,000 |
| Mac version (plus Apple's yearly developer fee) | About 4 weeks | ₹30,000 |
| Check connections: name the modules on a board and watch every port | About 2 weeks | ₹12,000 |
| Web version and Android app (plus the server's monthly cost) | Set when quoted | Quoted |
Times are approximate. Prices hold until 30 June 2027. All amounts are before TDS, if Science Kidz deducts any.
How it works
Adding a feature
Choose
Pick any feature, whenever you are ready. Each one stands on its own.
When it is built
Vision blocks ordered before Month 3 starts are built during Months 5 and 6, as their own checkpoint, inside the six months. The others follow Phase 1, in the order you choose.
Its own checklist
Each feature gets a checklist, agreed before work starts, and is accepted the same way as the Phase 1 months: a demo, then 7 days for your tester.
Fixed price
The prices shown hold until 30 June 2027. Features marked "quoted" are priced when you choose them. Each feature is paid half when you order it and half when it is accepted. The vision blocks you chose are paid half when their work starts and half once accepted.
You chose both ways
Vision: image recognition, QR codes, colours, faces and hands
You chose both: vision blocks inside the app, like PictoBlox, and Python with OpenCV, as in Techno Pi R4. The QR code and colour blocks are part of Phase 1, inside the ₹1,00,000, and on our call on 9 October you chose the vision blocks. Here is how the rest works and what it costs.
Part 1
Vision blocks in the app, like PictoBlox
The laptop's webcam shows on the stage. Blocks find faces and hands, and recognise hand gestures such as thumbs up or an open palm. Sprites, and a Science Kidz Nano board connected by USB, react to what the camera sees, including the QR codes and colours from Phase 1.
How it works
The detection runs on the laptop itself, using Google's MediaPipe models built into the app, so it works without internet and camera images are not sent anywhere. Camera programs run in live mode, like PictoBlox's stage mode: the program runs on the laptop, and a Nano board on its USB cable switches LEDs, the buzzer, servos and motors as the blocks say. A program uploaded into a board can't use the camera, because the board has none. Before the checklist is fixed, I test the camera blocks on one of your students' laptops.
Faces, hands and gestures, and robots that react to the camera
₹20,000
About 3 weeks
Train your own image recognition
Students show the webcam a few pictures of each object, for example a red ball and a blue cup. The app learns them in seconds, on the laptop, and a block then says which one it sees, so a sprite or a robot can react. Needs the vision blocks above.
₹12,000
About 2 weeks
Part 2
Python with OpenCV, as in Techno Pi R4
Sessions 22 to 27 of Techno Pi R4 (computer vision, drawing shapes, edge detection, face detection, text detection and hand gestures) are written in Python. Students write and run these programs with the webcam, as they do today, in Thonny or in an editor inside the app (see Python and MicroPython below).
How it works
OpenCV reads QR codes, finds colours and faces, and draws shapes and edges on its own; MediaPipe adds hands and gestures. Python and these libraries come inside the installer in the versions your class programs use, because newer MediaPipe versions changed how hand and face detection are written. One or two of your R4 programs tell us exactly which versions to include, and whether text detection needs one more library.
Part of Python and MicroPython
No separate price. Either Python option also brings Python L-1 and L-2, and MicroPython on the Pico.
From ₹20,000
About 3 to 6 weeks
The vision blocks you chose are built during Months 5 and 6 and checked as their own checkpoint, inside the six months: ₹10,000 on the 15th when their work starts, and ₹10,000 once they are accepted. The Python feature follows Phase 1, when you choose it.
The rest, in the order you chose on our call
More features
Pico and Pico W with blocks
The Raspberry Pi Pico and Pico W programmed with blocks, like the Nano: LEDs, buttons, sensor readings and servos, uploaded with one click and checked on your boards. Moved out of Phase 1 on our call on 9 October, in exchange for ESP32 Wi-Fi and IoT.
How it works
The blocks write Arduino code for the Pico, as for your other boards. A block program replaces MicroPython on the Pico until MicroPython is put back, so for your MicroPython classes on the Pico, the Python feature below is the better fit; Thonny can put MicroPython back on the board.
₹6,000
About 1 week
Python and MicroPython
Python for Python L-1, L-2 and Techno Pi R4, with OpenCV, MediaPipe and NumPy ready for the vision sessions (Part 2 above), and MicroPython on the Pico and Pico W for the R4 sessions with the PIR, potentiometer, OLED, BMP and RTC. There are two ways to have it.
Thonny, set up for your classes
Thonny, the Python editor your classes already use, comes inside the installer with Python and these libraries in the versions your programs need, and opens from a button in the app. Thonny also writes MicroPython programs to the Pico and shows what they print.
₹20,000
About 3 weeks
An editor inside the app
Python and MicroPython written inside the app itself, next to the blocks, with the same libraries. The app copies MicroPython programs to the Pico over USB and shows what they print.
₹45,000
About 6 weeks
How it works
Either way, Python and its libraries come inside the installer, so students install nothing else, and programs run on the laptop. One or two of your R4 programs tell us the exact versions to include.
AI helper that explains code
An "Ask for help" button that explains the student's code and errors with step-by-step hints, so the student still has to think.
How it works
Only the student's code and the error message are sent, with no names, through a small online service that holds the AI key and a monthly limit you set. It needs internet. The AI usage is paid directly to the provider, roughly ₹300 to ₹1,000 a month for your students. Only providers whose terms allow apps used by students under 18 are used.
₹18,000 plus AI usage, paid to the provider
About 2 to 3 weeks
Mac version
The same app for students with Mac laptops, about 1 in 10 of your students: all the Phase 1 features, on macOS 12 or later, on both newer Macs with Apple chips and older Intel Macs.
How it works
Built from the same code with the Mac versions of the board tools, and tested with your boards. Every part of the app, including the tools that send programs to the boards, is signed and checked by Apple, so it opens on Macs without security warnings. Apple charges a yearly developer fee (USD 99), paid directly to Apple. Python on the Mac, if you choose the Python feature, is quoted with it, and so is updating the app's desktop base if a new macOS version needs it.
₹30,000 plus Apple's yearly fee
About 4 weeks
From your later questions
Detecting connections, and a web version
Check connections
A "Check connections" button that looks at the board and lists what it finds: the displays, clock, pressure and motion modules, RFID and nRF24 by name, the DHT11 and the ultrasonic sensor on their ports, and a live view of every port on the Nano board, so a student can see which port changes when they press a button or wave at the PIR sensor.
How it works
The app sends a short test program to the board that asks each port, and the modules that have their own chip, what is there, then shows the results with each module's name and picture. The check replaces the program on the board for a moment, so the student uploads their own program again afterwards with one click. Simple modules such as LEDs, motors and on or off sensors have no chip, so they show as a port that changes, not by name. The check works on all your boards; the live view of every port uses live mode, so it works on the Nano.
₹12,000
About 2 weeks
Web version and Android app
The same app in Chrome or Edge, with nothing to install, and an Android app for phones and tablets.
How it would work
Most of Phase 1 carries over: the blocks, the stage, your boards and module blocks, and the project files. On the website, programs are compiled on a server and sent to the board over USB from Chrome or Edge, on Windows laptops, Macs and Chromebooks; iPhones and Safari can't connect to boards. The server has a monthly cost and upkeep, and logins are needed if students save work online. The Android app uses the same code, with extra work for USB and Bluetooth on the phone and the same server for compiling programs.
Quoted when you choose it, plus the server's monthly cost
For later phases, quoted when you choose them
More extensions, like PictoBlox
Phase 1 includes the extension library, with your Science Kidz blocks, Scratch's Music, Pen and Video Sensing, and ready-made blocks for about 15 more modules. Each extension is a separate set of files, so these can be added one at a time in later phases.
Speech, translation and chatbot
Speech recognition (students speak and the blocks get the words), text to speech, translation, and a chatbot that students program with blocks.
How it would work
Speech recognition, translation and the chatbot need internet and an online service, used through a small service of ours with a monthly limit you set, and only with providers whose terms allow students under 18. Text to speech can use the laptop's own voices.
Quoted when you choose it
More vision and machine learning
Object detection that finds and names common objects, body pose, hand pose, reading printed text, and more train-your-own models for sounds and numbers.
How it would work
These run on the laptop like the vision blocks, using the same camera and the same kind of models, so they work without internet. They build on the vision blocks.
Quoted when you choose it
Graphs and data
A live graph of sensor readings, a data logger that saves readings to a file, and weather data for projects.
How it would work
The graph and the logger read the values the board sends over USB, as the serial monitor does. Weather data comes from an online weather service, so it needs internet.
Quoted when you choose it
Internet services for IoT
IFTTT and ThingSpeak blocks, so ESP32 projects can send readings to the internet and trigger actions.
How it would work
They build on the Wi-Fi and IoT blocks in Phase 1: the board sends its readings over Wi-Fi to the service.
Quoted when you choose it
Games and animation
Physics for sprites, animated text, and game controllers for Scratch games.
How it would work
These are blocks inside the editor, for the stage and sprites, and need no board.
Quoted when you choose it
LEGO WeDo 2.0 and Spike
Blocks for the LEGO hubs used in your Tinkerer and Jr. Techie (WeDo) and Spike courses.
How it would work
The WeDo 2.0 hub connects to the laptop only over Bluetooth Low Energy, which the app doesn't use yet, so it needs a new connection inside the app before the blocks. Spike hubs can also use a USB cable.
Quoted when you choose it
Quoted when you want them
Also possible later
Payments and terms
Payments, acceptance and terms
How and when payments are made, how each month is accepted, what we need from you, and the terms.
Phase 1 fee
₹1,00,000: ₹10,000 to start, ₹10,000 for each of Months 1 to 4, ₹50,000 for Month 5, paid on the 15th
This follows your own plan: ₹10,000 a month, and the rest together in the fifth month when all is done. An advance of ₹10,000, paid when you accept this proposal, starts the work. After that, payments fall on the 15th of the month: ₹10,000 for each of Months 1 to 4, and the final ₹50,000 for Month 5, after your yearly funds arrive in March. By then every Phase 1 feature is built, as you planned. Month 6 is for fixes from your tester, training and handover, and the source code is handed over at its end.
| For | Paid on | Payment |
|---|---|---|
| Advance: you accept this proposal, and the design weeks start | On acceptance, Oct 2026 | ₹10,000 |
| Month 1: digital and analog control on the Nano | 15 Dec 2026 | ₹10,000 |
| Month 2: motors, sensors and displays | 15 Jan 2027 | ₹10,000 |
| Month 3: Bluetooth and code editing | 15 Feb 2027 | ₹10,000 |
| Month 4: ESP32 board, Wi-Fi and IoT | 15 Mar 2027 | ₹10,000 |
| Month 5: remaining modules, QR codes and colours, everything built. Final payment | 15 Apr 2027 | ₹50,000 |
| Month 6: fixes, training and handover. The source code is handed over | Apr 2027 | Nothing due |
| Phase 1 total | ₹1,00,000 | |
| Vision blocks, chosen on our call: half when their work starts, half once accepted | 15 Mar and 15 Apr 2027 | ₹20,000 |
| Total with the vision blocks | ₹1,20,000 |
How payments work
- Each payment is made against an invoice, by bank transfer or UPI. All amounts are before TDS, if Science Kidz deducts any; GST is added only if it applies.
- Payments fall on the 15th of the month. A checkpoint accepted by the 15th is paid on that day; one accepted after it, on the next 15th.
- Work on the next month carries on while your tester checks a version. It pauses only if a payment is more than 7 days late.
- If Month 5 is late because something from Science Kidz arrived late, ₹40,000 is paid on its planned date (15 April 2027 if you accept in October) and the last ₹10,000 on the 15th after Month 5 is accepted. If it is late because of me, the payment waits for acceptance.
- The six months include the design weeks. The dates above assume you accept in October 2026, so the ₹50,000 falls after your yearly funds arrive in March.
Test versions until the final payment
The version shared at each checkpoint is a test version for your students to use. It shows "Test version" on screen and keeps working for 60 days, and each new checkpoint brings a fresh version with another 60 days. The day the final payment arrives, you get a version with no time limit; the source code follows at the end of Month 6.
Checked on real boards
How a milestone is accepted
Demo
Shown working on a video call, with the real Science Kidz boards on camera, and a short note of what is done, what is still open and next month's plan.
Your tester tries it
Your tester has 7 days to use it with students and report anything on the list that doesn't work.
Fixes
Anything on the list that fails is fixed. New ideas go to the additional features and don't hold up the month.
Payment
Due when the list passes, or 7 days after the demo if nothing on the list is reported, and paid on the next 15th.
From Science Kidz
What we need from you
- The chart or schematic showing which port connects to which pin on each Science Kidz board, at the start of the design phase.
- The boards and modules for development, bought by Science Kidz and sent by courier: two Nano boards, the ESP32 board, an HC-05, an HC-06, one robot and one of each module. The Nano boards and the simple modules are needed for the design phase; the rest by Month 3.
- The list of your sensors (names or photos are enough) during the design phase, so the scope document can name each sensor block, and one of each sensor by courier before Month 3.
- The ArduBlock software your team uses, during the design phase, so the new blocks can use the same names.
- Your ArduBlock Bluetooth Robot program file and the App Inventor phone app (.aia) used in class, before Month 3.
- The Wi-Fi and Blynk projects from your Tech Wizard R3 course (worksheets or program files), before Month 4.
- Your logo files, and the app's name once you have decided it.
- If possible, a small group of students who can try the Month 3 or Month 4 version in class.
- A tester who can try each version within 7 days of the demo. You named Maithilee Maurya, Senior Mentor.
If something arrives late, the months that need it move by the same number of days.
Terms
Ownership, acceptance, support and the rest
Prajwal Shelar keeps the copyright on the app's new code, and the code is not published. After the final payment, Science Kidz gets a permanent right to use, change and rebrand the app and give it to its students, at all its centres and in the school programmes it runs, with no further fees. Giving it with kits sold to others, or selling or licensing it to other schools or academies, is agreed separately. Your own material stays yours: your logo, course sheets, port charts, programs and block names.
The app uses open source libraries and tools, including OpenBlock, Scratch 3 and the Arduino tools, under their own licences (MIT, BSD, Apache, GPL and LGPL). Their licence notices and source links stay in the app, as those licences require.
A checklist item fails only if the problem repeats on the agreed test set-up: the boards, robot, phone and laptop we test with. If an activity also fails with ArduBlock on the same set-up, the cause is the hardware, not the app. Small faults that don't stop an activity are fixed in the next version and don't hold up a checkpoint. Fixes are checked again within 3 days.
Board and module features are built on the boards, libraries, port charts and programs Science Kidz supplies. Anything that needs undocumented protocols, new firmware, reverse engineering, new drivers or changes to the hardware is quoted separately.
30 days of free fixes after the final version, for anything on the checklists that stops working. This covers the app itself. Problems caused by hardware, wiring, damaged boards, Windows or driver updates, or outside services (MIT App Inventor, Blynk, AI providers) are not covered, though I will help find the cause. After that, a monthly support plan or per request, agreed separately.
The signed scope document is the full list of what Phase 1 includes. The additional features have fixed prices until 30 June 2027. Anything else is quoted before work on it starts. Before a month begins, a feature in it can be swapped for one of similar size if we both agree in writing; WhatsApp is fine.
If I leave the project before Phase 1 is finished, I return everything Science Kidz has paid until then, including for add-ons, within 30 days. This does not apply if I stop because a payment is more than 30 days late.
Science Kidz can end the project in writing at any time. It then pays for the work up to the last checkpoint shown in a demo, less what it has already paid, as below; a month that hasn't reached its demo isn't charged. Science Kidz then gets that checkpoint's version with no time limit, for its own students, and keeps the scope document. Value of the work up to each checkpoint: design weeks (scope document sent) ₹10,000; Month 1 ₹25,000; Month 2 ₹40,000; Month 3 ₹60,000; Month 4 ₹75,000; Month 5 ₹90,000; Month 6 ₹1,00,000. The vision blocks: half once their work has started, all once shown in their demo.
My total responsibility for any claim about Phase 1 is limited to the fees paid for it.
The boards and modules Science Kidz sends stay Science Kidz's property. I keep them safe and return them at the end of Phase 1, or keep them for support if you prefer.
We both keep each other's business information private. This agreement follows Indian law, and anything we can't settle by talking goes to the courts in Mumbai.
Still to confirm
A few answers we still need
You will decide the name later. Until then the app is the Science Kidz Programming App, with your logo. Which website domain do you own for it?
The names or photos of your 30 to 40 sensors, during the design phase, so the blocks use the same names as your classes.
One or two of your Techno Pi R4 vision programs, so we know which Python and library versions your class programs need.
The boards and modules for development are bought by Science Kidz, separately from the ₹1,00,000. Is that right?
A short progress update on WhatsApp each week, and a fixed day and time for each monthly demo, agreed once you accept the proposal.
Who will accept the proposal and sign the scope document for Science Kidz?
Accept and start
Choose your add-ons, then accept on WhatsApp
Tick any additional features you want. The total and the timeline update as you choose, and the buttons open WhatsApp with everything filled in, ready to send to Prajwal on +91 99879 09499.
Additional features (optional)
Turn on JavaScript to choose add-ons here. The buttons still work.
The vision blocks, chosen on our call, are ticked already; they are built during Months 5 and 6 as their own checkpoint, and paid half when their work starts and half once accepted. Other add-ons follow Phase 1, one after another, paid half when ordered and half when accepted. Prices hold until 30 June 2027.
Your total and timeline
Nothing is sent until you press Send in WhatsApp. Questions can also be discussed on a call.
Start the project: the ₹10,000 advance
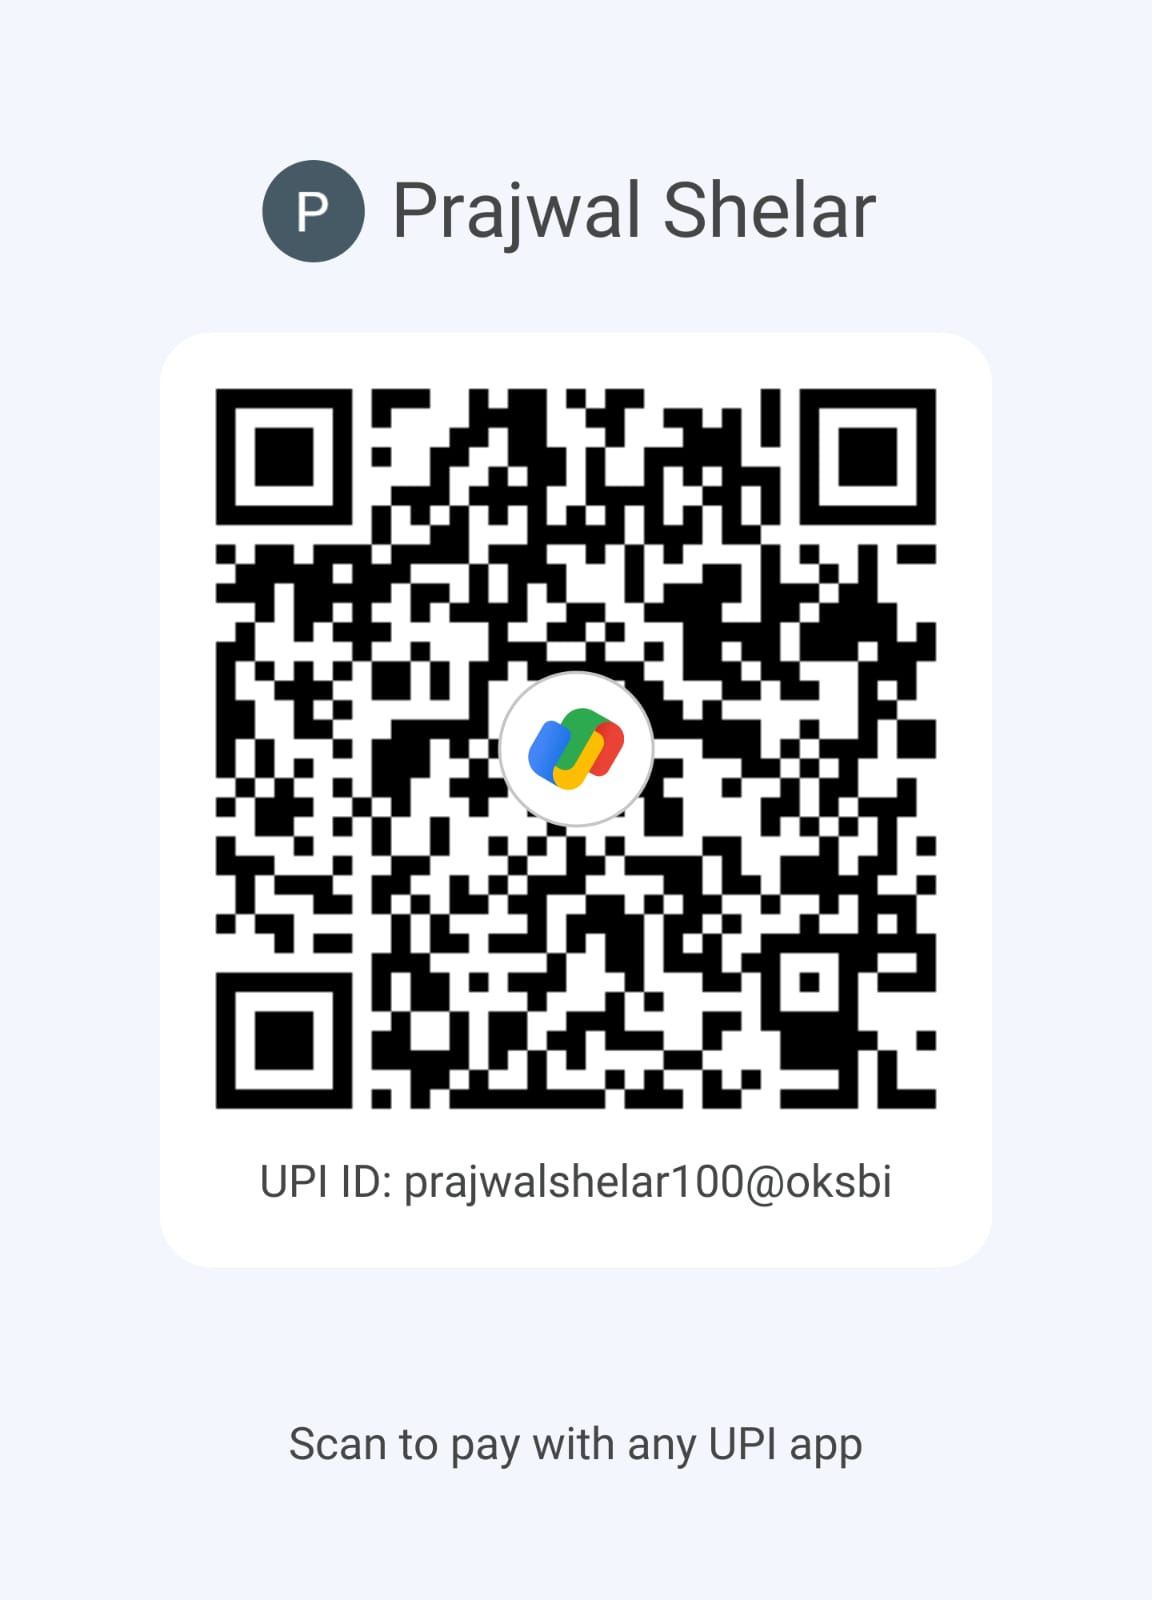
UPI ID
prajwalshelar100@oksbi
Scan the code with any UPI app, or copy the UPI ID, and pay ₹10,000 to Prajwal Shelar. The design weeks start when the advance arrives; please send the payment screenshot on WhatsApp. If Science Kidz prefers a bank transfer, I will send an invoice with the bank details.
To accept, message Prajwal on WhatsApp on +91 99879 09499, or open this proposal online and press Accept. The ₹10,000 advance goes to UPI prajwalshelar100@oksbi.